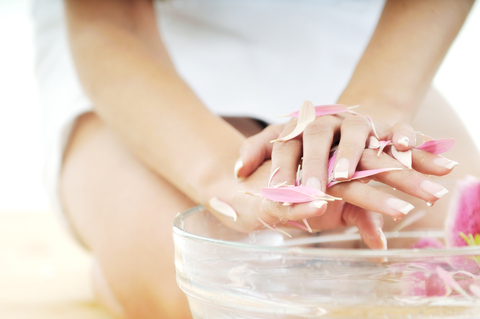
Regular visits to beauty salons for manicures and other skin care treatment methods can get costly. The cost of buying the best quality natural skin care products for your hands, feet and as well as for your face and body really starts to add up over time. Many people tend to focus on their facial skin and ignore their hands, but the hands also need caring for as well. Rough, chapped hands can portray a less than desirable impression. It is surprising how many people take a mental note of the state of your hands and nails when they first meet you. Every beauty conscious person should pay equal attention to their face and hands. We have 4 great DIY beauty treatments for you to care for your hands and feet, naturally
The following is a simple and natural homemade recipe for a hand scrub, for the ultimate in DIY hand care.
1 tablespoon of white oats
1 tablespoon of honey
½ a cup of water
1 tablespoon milk
Mix the oats and water in a vessel and bring to boil until the water evaporates, making sure not to burn the oats. Place the oats in bowl and mix with milk and honey to form a paste.
• Wash your hands with a gentle soap
• Dry with your hands with a soft towel
• Apply the scrub on your hands and rub until a smooth leather forms
• Allow the scrub to remain on your hands for 15 minutes
• Wash the scrub off using warm water
• Dry your hands with a soft towel
• Apply some moisturizer on your palms and massage throughout your hands
• Use the scrub twice weekly to get the best results
DIY Foot Soak Recipe
Your feet will absolutely love this Minty Foot Reviver!
• Half a cup of sea salt
• 3 lime slices
• 7-9 mint leaves
• A couple of drops of lime essential oil. Add about 6-8 drops and combine with all these ingredients. Add them into a bowl filled with lukewarm water. Deep and soak your feet in mixture for about 15 minutes.
DIY Foot Scrub Recipe
This is a wonderfully moisturizing foot exfoliating treatment which will reveal softer, smoother feet in no time!
• 3 limes
• 2 tablespoons white sugar
• 1 tablespoon sweet almond oil
• 14 fresh mint leaves, chopped
• 6-8 drops of lime essential oil
Finely cut the limes into smaller pieces, an compact these small pieces into a thick pulp before placing in a food processor. Mix the thick pulp of lime with the other ingredients in the bowl.
Gently apply this homemade foot scrub after removing your feet from the feet soak. Use circular motion when applying the scrub. Use warm water to remove the scrub while massaging with a damp towel. Rub on a mint moisturizer to leave your feet looking and feeling fresh.
Paraffin Treatment
One simple and fairly inexpensive way to get a baby smooth feel is with a paraffin bath that can be purchased at a beauty supply store or online. Make sure you carefullyfollow the directions, and that the temperature of the wax isn’t too hot to prevent burning your skin.
Paraffin treatments may be used as a DIY beauty treatment, but also for treating stiffness, aches and arthritis as the paraffin can retain heat. Once a hand, foot, knee or elbow is dipped into the liquid and removed, the paraffin turns into a solid wax and the heat (fusion) is absorbed into the body.
The heat from the paraffin also opens pores and increases circulation, which helps to leave your skin soft and radiant.
Liquefy the paraffin according to the instructions.
Dip your hands or feet into the wax (suggestion to hands and feet separately, you’ll want your hands free when doing your feet).
Remove hands or feet and wait for a few moments to cool.
Repeat this process several times for multiple layers of wax.
Put on the gloves that typically come with the paraffin bath (or your own), or socks if you’re doing your feet, as it retains moisture.
Relax for 10 to 15 minutes.
Carefully peel off wax to reveal beautifully soft skin.
Rinse with warm water and pat dry.
Remove any excess wax from cuticles and underneath nails.
Spending just a little time on DIY beauty treatments for your feet and hands will make sure that your hands, feet and nails are kept healthy, nourished and looking beautiful, and that your skin never gets exposure to harmful ingredients.
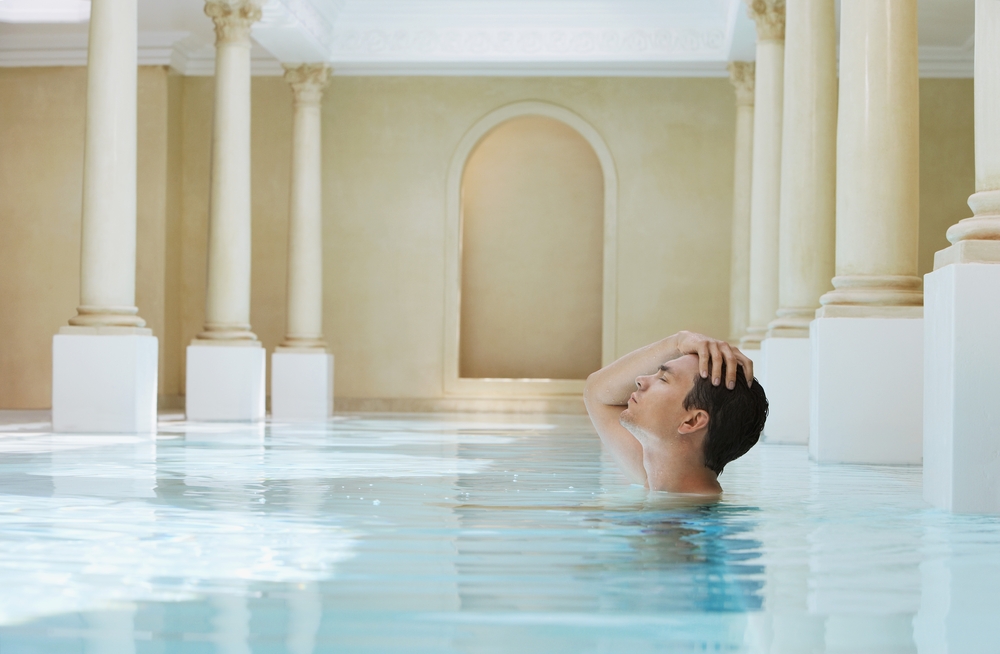
The same way women take care of their bodies and spirits by pampering themselves, a hard-working man also needs the chance to relax, recharge and revive. With hefty competition in the business world — and that the “rules” for what’s acceptable for men and women have changed considerably — it’s no longer unusual to see men relaxing in comfortable chairs, wearing face masks while getting a manicure in non-gender specific salons or spas.
Men are often unaware of just how important relaxation and rejuvenation is to their mind and body. Being masculine doesn’t necessarily mean having to avoid feeling relaxed and pampered.
In fact, an increasing amount of men are taking more care of themselves and indulging in self-care at spas on a regular basis around the world. It’s good to know they’re becoming more aware that relaxation and pampering is important for anyone interested in wellness and looking for ways to cope with the stress of their busy modern life.
From manicures, face masks and natural shave treatments, there are plenty of ways for a man to pamper and rejuvenate himself naturally and at home.
Following are ideas and recipes for a “manly” Day Spa at Home:
ALL-NATURAL MOISTURIZER
Shaving can remove up to two layers of skin cells, so moisturizing afterward with a quality natural moisturizer is a perfect balm for your man’s skin health.
A man’s skin is different to a women’s it’s thicker and often oilier. So (perhaps lucky for you so he won’t steal yours) he needs a different kind of post-shave moisturizer.
ALOE VERA GEL is a perfect natural option for men as it’s light, soothing and has natural healing properties.
A DIY YOGURT, HONEY AND PUMPKIN SEED OIL BUTTER TREATMENT is wonderful moisturizing mask:
Combine 1 tsp. plain organic yogurt, 1 tsp. honey, and 1/2 teaspoon pumpkin seed oil in a small bowl.
Slather the concoction on his face and throat area, or on any problem areas.
Leaving on for 15 to 20 minutes.
Remove with a warm, wet washcloth; then finish off with a splash of cold water to close the pores.
This is a deeply hydrating, indulgent experience that softens the skin (which you can enjoy as well), and gets it ready for shaving.
DIY EXFOLIATION
A man’s skin attracts more oil and dirt than a woman’s. The larger pores, whiskers and a tendency to sweat more are a main reason why men should exfoliate their skin on a regular basis.
Also, exfoliating dead cells skin makes skin smoother. Hair follicles are exposed more which results in a cleaner, smoother shave — the ultimate goal of every shaving man!
Many men experience dry skin and irritation after shaving with regular over-the-counter shaving cream. Therefore, it’s vitally important that the beard is completely wet, softened and lubricated before shaving.
A great way to get a close shave without irritating the skin is with a combination of natural oils and other ingredients that restores skin and achieves a cleaner shave. Followed with a natural aftershave and moisturizer, they may work so well he’ll never go back to store-bought products with harsh chemicals!
ALMOND AND ORANGE DIY FACIAL SCRUB:
This antioxidant-rich DIY scrub helps defends against wrinkle-causing, collagen-damaging free radicals. The fine granules exfoliate dead skin cells and leave your skin soft, silky smooth and supple:
In a blender or food processor (if you don’t have either, a mortar and pestle will suffice) pulverize/grind a handful of shelled almonds (preferably without the skins), the peel of one (1) orange, and one (1) cup of almond oil.
When ground into a well-blended paste, apply to wet skin in small, gentle circular motions. Then wash with warm water, and dab your skin dry with a clean towel.
HOMEMADE SHAVING CREAM
2/3 cup of Shea nut oil or Shea butter
2 Tblsp. baking soda
1/4 cup olive oil
2/3 cup coconut oil
2 vitamin E capsules
Ten (10) drops of his (or yours) favorite essential oil that has a masculine fragrance such as bergamot, cedarwood, patchouli or vetiver
First melt the coconut and Shea nut oil or butter together in a small pan on the stove. (If you choose to microwave them, do so in small increments such as 15 seconds at a time to prevent boiling and spattering.)
Turn off the heat and stir in the olive oil.
Once everything is nicely melted and blended together, add the rest of the ingredients.
After one final stir, place liquid in a refrigerator safe container.
Allow liquid to cool and thicken overnight. Then add the baking soda and liquid from the vitamin E capsules.
Mix until light and fluffy.
The result is a soothing, natural shaving cream that allows the razor to glide across his skin.
NATURAL WITCHHAZEL AFTERSHAVE
Witch hazel is the perfect natural aftershave as it has anti-inflammatory properties that soothe the skin after a shave, and deal with irritation, razor burn or bumps. It also has cleansing, toning and moisturizing properties that are perfect for men who don’t want to use moisturizer.
Encourage the man in your life to have his own special DIY spa day, or perhaps join you during your Day Spa at Home.
If you want beautiful baby-soft skin all over, moisturizers like body butters are an indulgent way to hydrate your skin. By adding a few drops of your favorite essential oil, they become the perfect vehicle to scent your body with delectable fragrances while making your skin oh-so-touchable. So we have included instructions on how to make your own DIY body butter with two wonderful recipes.
How to Make Home-made Body Butter
Place carrier oils, vegetable oils, beeswax, and Shea or cocoa butter in a heatproof glass mixing bowl inside a saucepan.
Keeping stirring the ingredients over medium heat until they’ve melted and blended well. (It takes a little while for the beeswax to completely dissolve, so be patient.)
Remove mixture from heat and stir in vitamin E oil, essential oils, or vanilla extract.
Whip with an electric handheld mixer for a few minutes until a butter-like consistency is attained, or the mixture forms peaks.
Fill a clean glass jar (not plastic as body butter can pick up smells) with the butter, and allow to come to room temperature.
Geranium and Ylang Ylang Body Butter
1/2 Tblsp. cocoa butter
1/2 Tblsp. beeswax, either grated or in pellets
4 drops vitamin E oil
2 Tblsp. coconut oil
2 Tblsp. almond oil
1/4 tsp. glycerin
25 drops geranium essential oil
12 drops ylang ylang essential oil
Vanilla Body Butter
1/4 cup sweet almond oil
2 Tblsp. coconut oil
1 oz. beeswax, either grated or in pellets
2 tsp. Shea butter
1 tsp. vanilla extract
Home-made body butters will keep for about three months at room temperature. However, those that contain coconut oil may soften in the summer, so if this happens just put the butter in the refrigerator. You’ll have plenty left over to continue using. And the fragrance will remind you of the relaxing benefits you’ve treated yourself to throughout the day. For more info on how to make you own body butter, watch the video below:
Or for more tips on how to treat your body head to our Body page.
TIP: Apply your body butter to your skin while it is still wet after stepping out of the bath or shower. You will only need a very small amount as body butter will glide over your skin. What’s more your skin absorbs moisturizing products better when its wet.
Coming up with the perfect gift idea for Mother’s Day is never easy and it is especially challenging if you have a tight budget that you need to stick to. If having been looking for the perfect way to show your Mom how much she means to you, but also come up with a thoughtful gift that will not drain your bank account, it might be time to consider the DIY approach to Mother’s Day.
There are some great gifts that you can make on your own that your Mom will adore just because it was made by you. You can also ensure that your Mom feels extra special by making all natural beauty treatments that allow her to pamper her skin. They are super easy to make so you still have time to spoil your Mom with a wonderful gift that’s extra special as its made with love.
Here are the 5 top DIY Mother’s Day gifts that you can try out to pamper Mom this year:
If you are looking for a Mother’s Day gift that will treat your Mom, it’s a great idea to make a body scrub. Body scrubs can be really easy to make on your own and only require a few ingredients.
A very popular all natural body scrub that you can make yourself consists of ingredients that you probably have in your home such as coffee grounds, baking soda, sea salt, or sugar. Each one of these ingredients provides the right amount of exfoliation while also not being too abrasive for the skin. You would then mix one of these ingredients with your favorite moisturizing oil such as jojoba, argan, or almond.
Here’s a very simple recipe with ingredients you may already have in the kitchen:
You will need:
1/2 cup brown sugar,
1 tablespoon orange oil or the juice of half an orange
The content of one vitamin E capsule
Mix all the ingredients together in oil a bowl until well combined. Transfer the scrub to a mason jar and decorate with ribbons, string or stickers.
Fragrant Whipped Body Butter
You can also make your Mom a home-made body butter that she will love to make her skin feel smooth. Instead of buying an expensive body butter, you can make one from home using minimal ingredients. The vanilla body butter is a favorite for many.
All you need is cocoa butter, coconut oil, an essential oil such as lavender, rose geranium or ylang ylang and vanilla bean. You will need to start whipping the coconut oil, and then add a essential oils to make the body butter extra moisturizing and fragrant. Then add a few drops of as vitamin E oil for extra antioxidant action which also acts as a natural preservative.
The secret to making this body butter rich and smooth is by whipping the mixture thoroughly by using an electric mixer. This recipe creates the most luxurious body butter that is also completely natural and inexpensive!
Decorate the home-made body butter in a glass jar with string, ribbons, flowers or stickers.
Watch this great video for more for detailed instructions and more ideas.
Anti-Aging Facial Serum
It is also possible for you to make a high quality facial serum for your Mom on mother’s day that will help to lessen the appearance of fine lines and wrinkles. Serums for your face can be ideal and a bit better than creams or lotions if your Mom happens to have dry skin. An anti-aging facial serum is perfect for the Mom that deeply nourish her skin and prevent the appearance of fine lines and wrinkles. If you can’t find all the oils mention below, just add lavender. The best part about a lavender facial serum is that lavender oil is easy to get your hands on (make sure you choose a quality lavender oil).
You will need:
1 oz apricot kernel, avocado or almond oil
5 drops lavender oil
5 drops geranium oil
2 drops sandalwood oil
Mix all the ingredients in a glass amber bottle and decorate. Affix a label with instructions to shake well before use. he oil blends will keep for a number of weeks. In summer it is best to keep them in the refrigerator.
You can find more great facial serum recipes at our Face page.
Scented Bath Soak
Bath time is the perfect time to relax and unwind. Allow your Mom to escape to her own personal Day Spa at Home where she can let all her tensions and cares melt away. This gift idea is perfect accompanied by a deliciously scented candle. Mom can play some relaxing music, light a candle and enjoy a nice glass of wine.
Take 1 cup sea salt, or Epsom salts or a combination of the two.
10 drops essential oil such as lavender, rose geranium, ylang ylang or a combination
1 teaspoon avocado oil.
Mix all ingredients well and store in mason jar or a decorative glass bottle. You can add some natural food coloring to brighten the color. Just add a drop, mix thoroughly and add a drop more at a time to get the color intensity you want.
For those who have a bit more time to spend, bath bombs are a wonderful treat. Watch this great video for a wonderful recipe and instructions on how to make:
Scented Reed Diffuser
You can transport your Mom’s senses to a Day Spa at Home with beautifully aromatic Reed Diffuser which will be all the more special because you made it yourself. Choose her favorite essential oil to uplift and delight setting the mood many special moments in the months to come.
You can buy reeds at most craft shops and cut them to fit in a small decorative jar that you have filled with your favorite essential oil and some alcohol. Use 12 drops of essential oil and 2 tablespoons of alcohol place the reeds in the container let them soak for about 1 hour then flip the reeds over.
For more great ideas for DIY home fragrance head to our Fragrance page.
Thankfully, there’s still enough time to make some all natural DIY Mother’s Day gifts without any chemicals, additives, or other harmful ingredients, which your Mom will just love!
Baths can be a useful way to transform your bathroom at home into a sensual and enjoyable sanctum that you won’t want to get out of any time soon! A great home-made natural beauty treatment is a detox bath that is both relaxing and luxurious for your skin.
To make your own detox bath treatment, start with Epsom salt, sea salt, baking soda, apple cider vinegar, and your favorite essential oil such as lavender or rose geranium for the perfect scent. Put all ingredients in your warm bath and just soak away. This detox bath is great for relieving stress as well as easing tired muscles, and always has health benefits to boot. We’ve got some great recipes below for a DIY Detox Bath, so light some candles and let’s get started. (more…)
Having a facial in a day spa is wonderful! It’s such a treat for your skin as well as your senses. You’re lying down in a candlelit room, having beautiful creams massaged into your face, while listening to calming, soothing music and breathing in heavenly aromas. But doing this on a regular basis is expensive. Plus, you have to book in advance and get yourself to your appointment. In the busy modern world we live in, who really has the time to do this very often?
The good news is that you really can make your skin softer, smoother and more beautiful by re-creating the day spa experience at home. You can use any products that you have. But, you can also make your own personal natural beauty treatments easily, without any chemicals, additives, or other harmful ingredients. You will also save money by creating your own natural beauty treatments as you will already have many of the ingredients in your kitchen.
So this weekend, select a day, make yourself a delicious detox water infusion (see our Detox Pages for recipes) and follow these simple steps for some serious pampering in your Day Spa at Home.
Put on a clean fluffy robe. Get towels and facecloths ready. Light some candles, burn incense or essential oils in a diffuser. Turn on some Day Spa music. A great suggestion is below:
Now you’re ready indulge in some at home skin pampering.
Cleanse
Coconut oil makes a great cleanser for all skin types. Even oily skin will benefit from a coconut oil cleanse. It gently removes dirt, impurities, and make-up, and excess oil and will leave your skin soft and moisturized.
Dampen your skin with a splash of warm water. Use 1/2 tsp coconut oil and allow the oil to melt between your fingers if it is solid and gently massage into skin on your face neck and décolleté for a minute or two. Remove with a facecloth dampened in warm water. Soak a cotton pad in witch-hazel and wipe gently over the skin removing any residue oil.
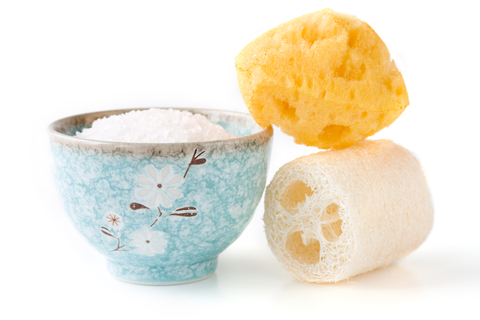
Exfoliate
Prepare a gentle scrub by combining 1 tsp baking soda and 1 tbsp thickened cream (or yogurt) in a bowl until they form into a thick paste. Apply your scrub to wet skin in gentle circular motions avoiding the eye area. Continue scrubbing for a few minutes. Remove scrub by washing with warm water.
Or you can perform a papaya peel. Papaya contains antioxidants and enzymes which help to slough off dead skin. Mash up some ripe papaya or wipe the inside of the skin of papaya that you have eaten, over your face, neck and décolleté before you rinse it off just, perform a steam cleaning treatment.
Steam cleaning
For a simple steam clean run a facecloth under really hot water (be careful not to let it get too hot that you burn yourself), wring out the excess water, and drape it over your face. Let the cloth sit for a few minutes. The enzymes from the papaya and the steam work together to really open the pores and clean and smooth the skin.
Clay Mask
A clay mask deep cleanses your pores and mops up impurities. It also makes your skin look beautiful and radiant. All you need is a little of any type of dry clay – like bentonite clay or fullers earth, and 1 tbsp of raw apple cider vinegar and a drop of essential oil like palma rosa, lavender or rose geranium. Mix it all together to form a paste like consistency. Apply to your face with your fingertips or a foundation brush avoiding the eye area. Let it dry on your face then rinse off (typically about 20 minutes). Remove by soaking a facecloth in warm water, apply the facecloth to the whole face to wet the clay and remove the clay very gently.
Hydrating Mask
You can use a natural, DIY face mask that leaves your skin soft and moisturized! Avocado has natural oils and nutrients in it that are just wonderful for pampering your skin.
Mash up a medium-sized ripe avocado, 2 tablespoons honey and 1/4 cup whole yogurt. Gently apply it to your face and neck. Sit back and relax for 20 minutes. Use a warm damp facecloth to remove the mask when you’re done.
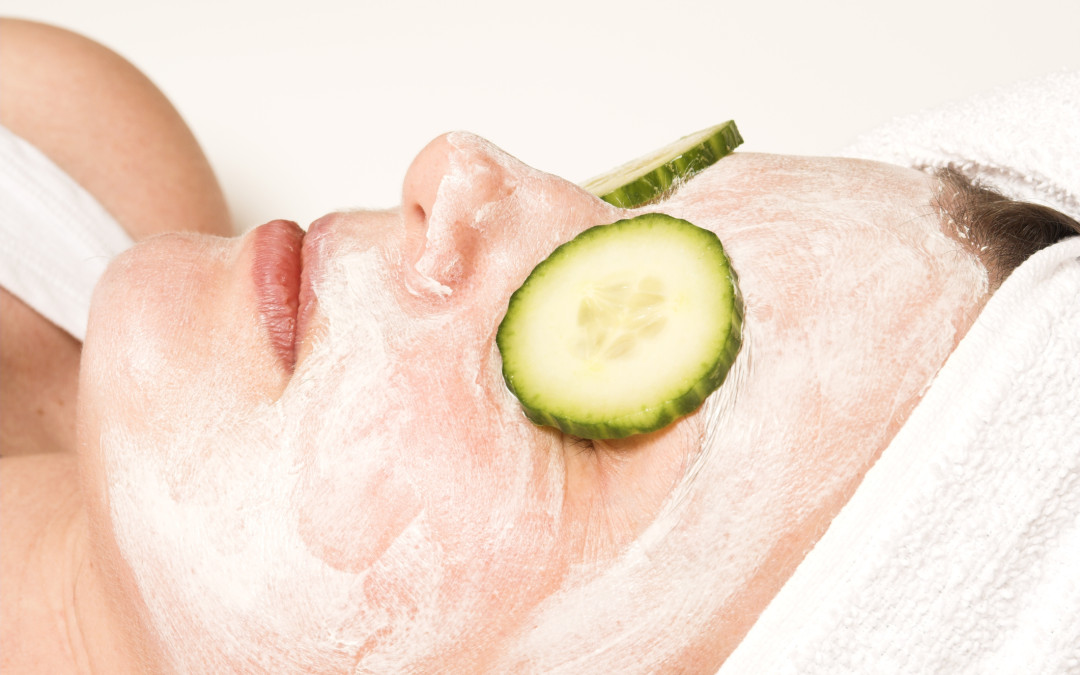
Eye Treatment
You can use the time while you have your hydrating mask on to get your eyes in shape and get rid of those puffy bags. One of the greatest weapons against dark circles is Chamomile tea. Soak cotton pads in a little cold chamomile tea and apply to dark circles. Allow the liquid to dry. The anti-inflammatory properties of chamomile will soothe and calm your tired eyes and help tighten skin while reducing redness. Lay back with your eyes closed for about 15 minutes. You can also use cotton pads soaked in witch-hazel or rose water or slices of cucumber. These natural ingredients are naturally cooling to the body and help to reduce redness and puffiness.
Facial serums are great for adding some much-needed moisture in the skin, as well as for applying regularly to usual problem areas such as directly on frown and smile lines, around the eyes, or when your skin just needs a little extra care. The best facial serums are completely natural and made from ingredients that can be understood and pronounced, meaning no chemicals or other harmful ingredients should be in your facial serum.
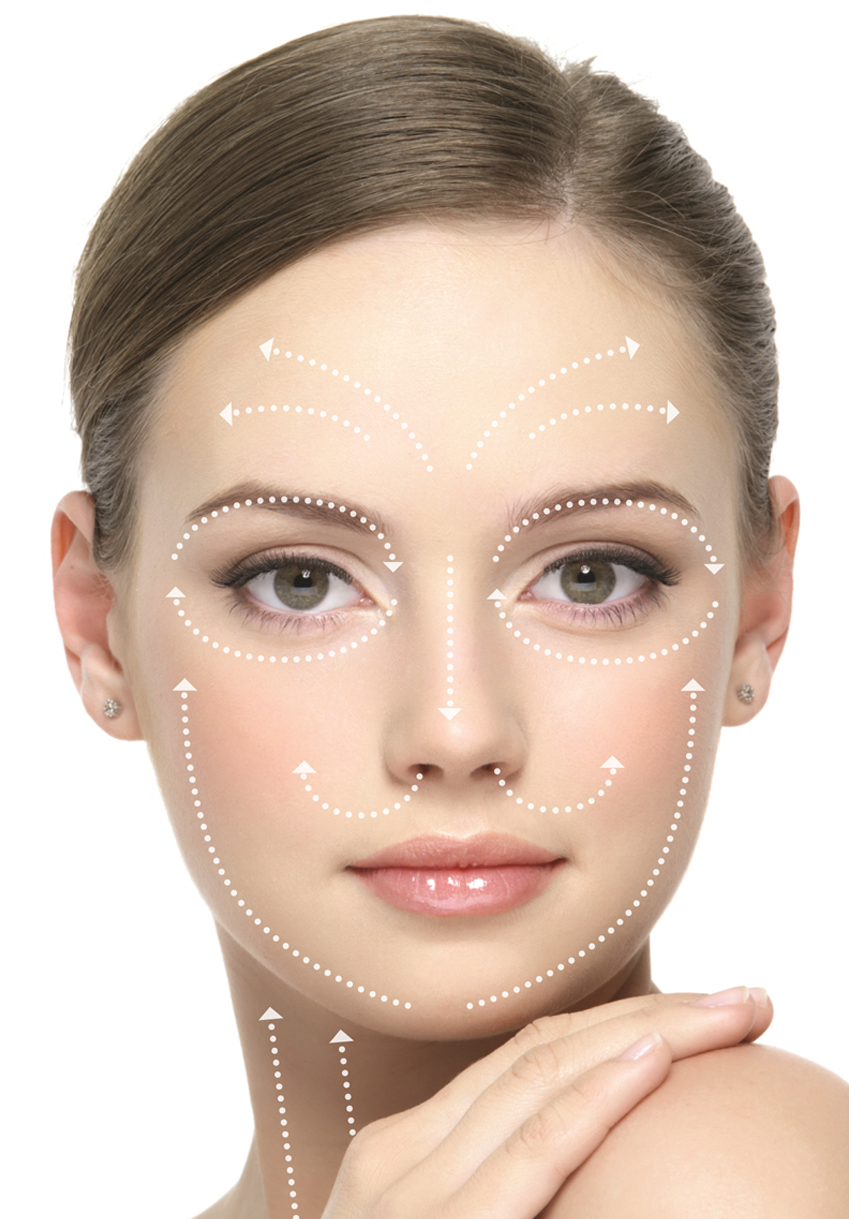
Mix 1 oz apricot kernel, avocado or almond oil, 5 drops lavender oil, 5 drops geranium oil, 2 drops chamomile or sandalwood oil in a glass amber bottle and shake well before use. Massage well into cleansed skin using upward motions following the directions in the image above. For the leftovers, the oil blends will keep for a number of weeks. In summer it is best to keep them in the refrigerator.
Finish off with your favorite moisturizer to seal in the oils and you have now completed your DIY facial.
Relax
Listen to music, read a book or watch an uplifting movie. This is your time to treat yourself, to recharge your batteries and soak in the benefits of the wonderful natural beauty treatments that you have given yourself. Remember to schedule in some pampering on a regular basis to recharge your batteries as well as pamper your skin.